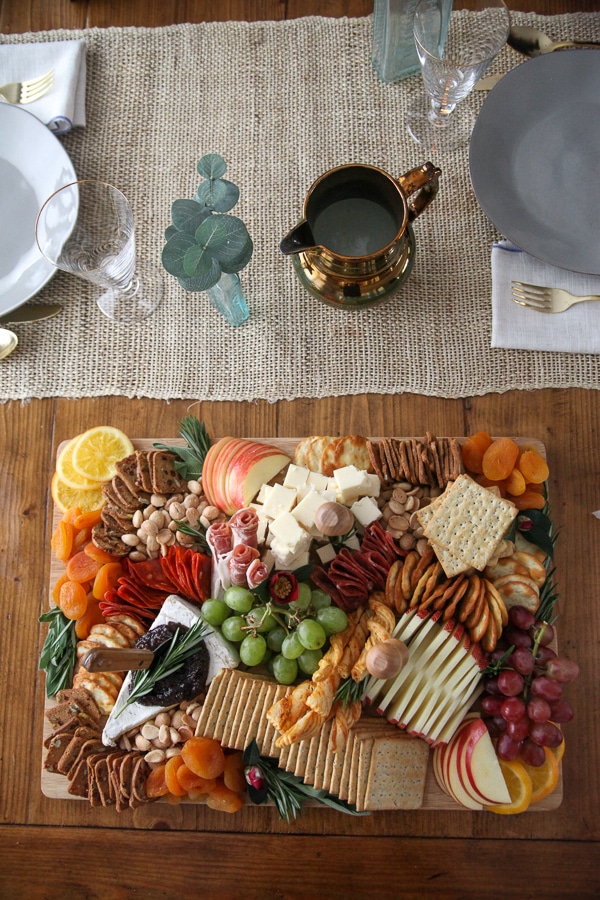
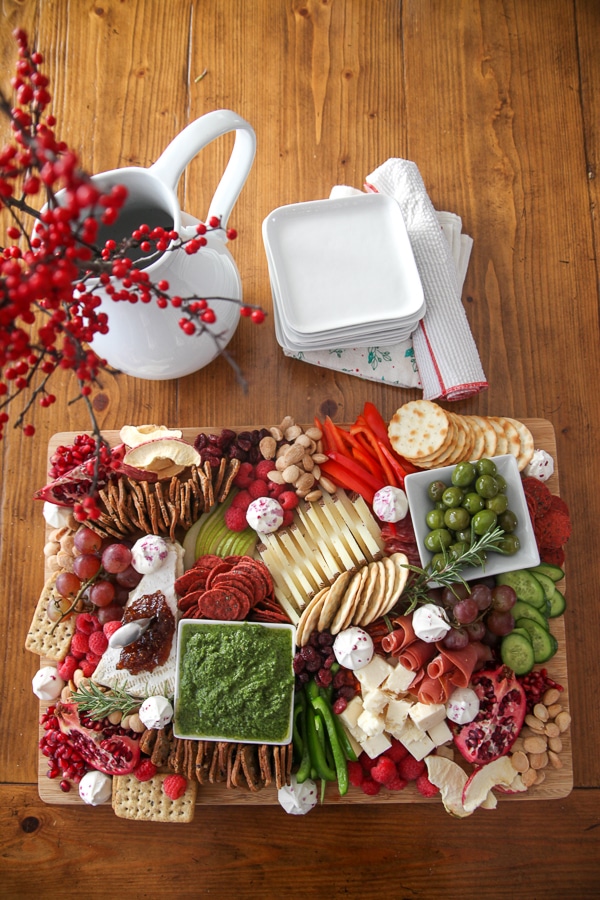
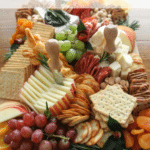
This Thanksgiving Charcuterie Board how-to has everything you need to create a professional-looking cheese board in your home for just $60! All of the ingredients come from Trader Joe’s and the step-by-step instructions will show you exactly how to put them together to create a beautiful board for your Thanksgiving or holiday table.
Thanksgiving Charcuterie Board Tutorial
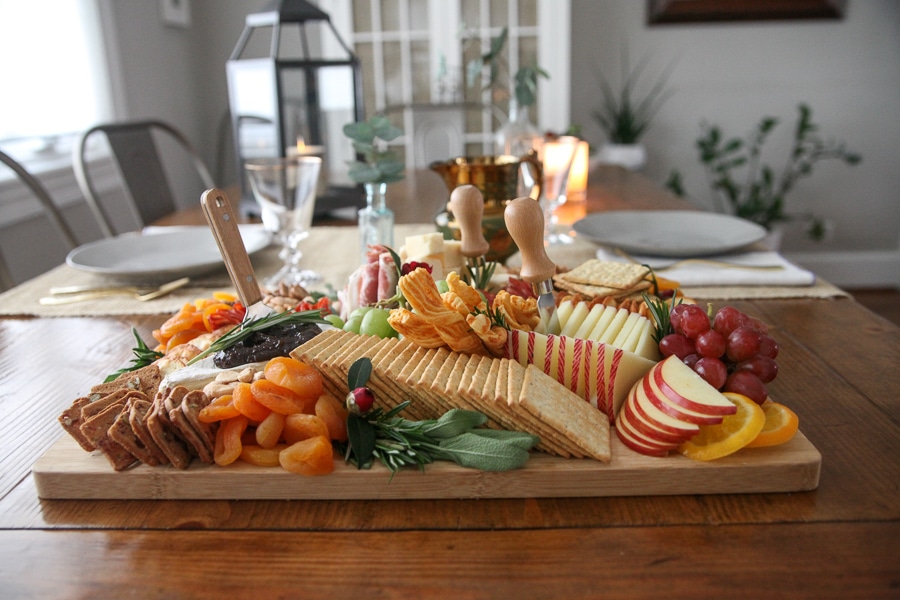
If you’re looking for the perfect Thanksgiving day appetizer, look no further than this abundance board of meat and cheese, crackers, fresh and dried fruit, and snacks galore.
You can copy this charcuterie board step by step and confidently serve it for your big day. (And all the holidays and parties beyond!)
Just change up the decorations for the seasons – add mini pumpkins and dried cranberries in the fall, swap in seasonal fruit like berries in the summertime, or make the festive holiday red, white, and green version!
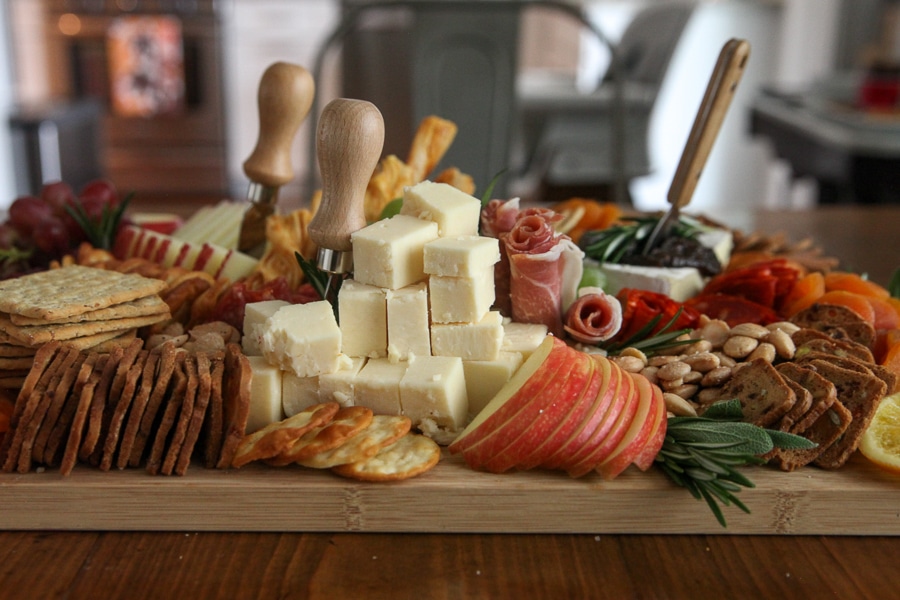
Looking at a finished board, it’s hard to know how much of everything to buy, so we have done all the hard work for you and have everything from your shopping list to details on exactly how to cut the cheese (har har har) and arrange each group of ingredients into beautiful layers.
Once you get the hang of the formula and method, you’ll be able to design your own boards using whatever ingredients you desire.
What’s On Our Board: Cheese Board Ingredients
3 Cheeses
a variety of different types of cheeses will please all people. I like a soft cheese like brie, a sharp cheese like cheddar, and a manchego or gouda!
3 Meats
these come in a 3-pack at Trader Joe’s so they’re easy! Look for a variety of mild-to-spicy flavors
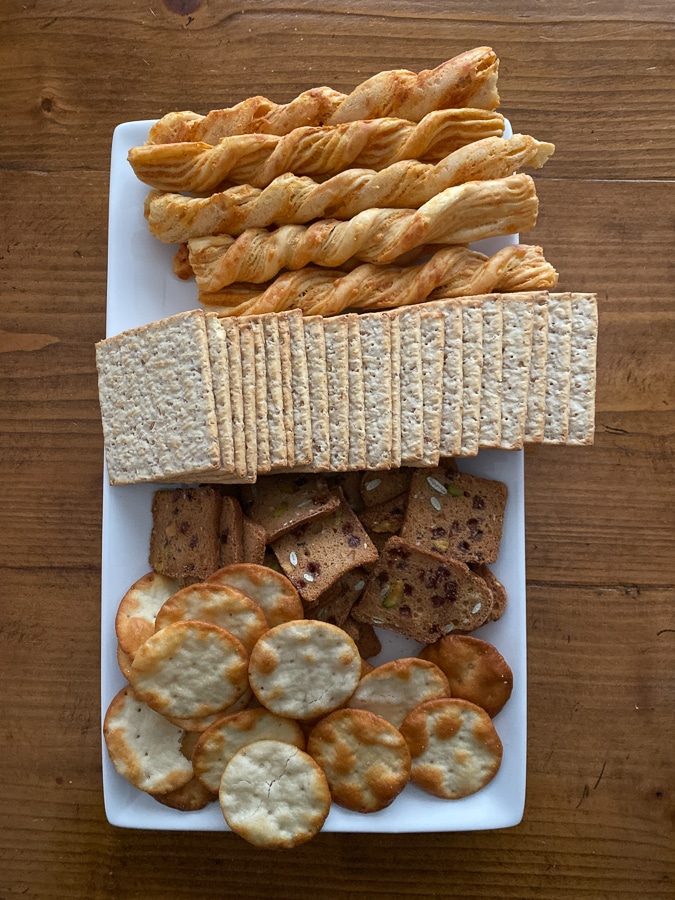
4 Kinds of Crackers
pick 3-4 different kinds, including cool ones like cheese straws, neutral ones, and maybe sweet ones too!
Dried Fruit
The TJs candied oranges are so yummy and pretty + dried apricots or cranberries are great too
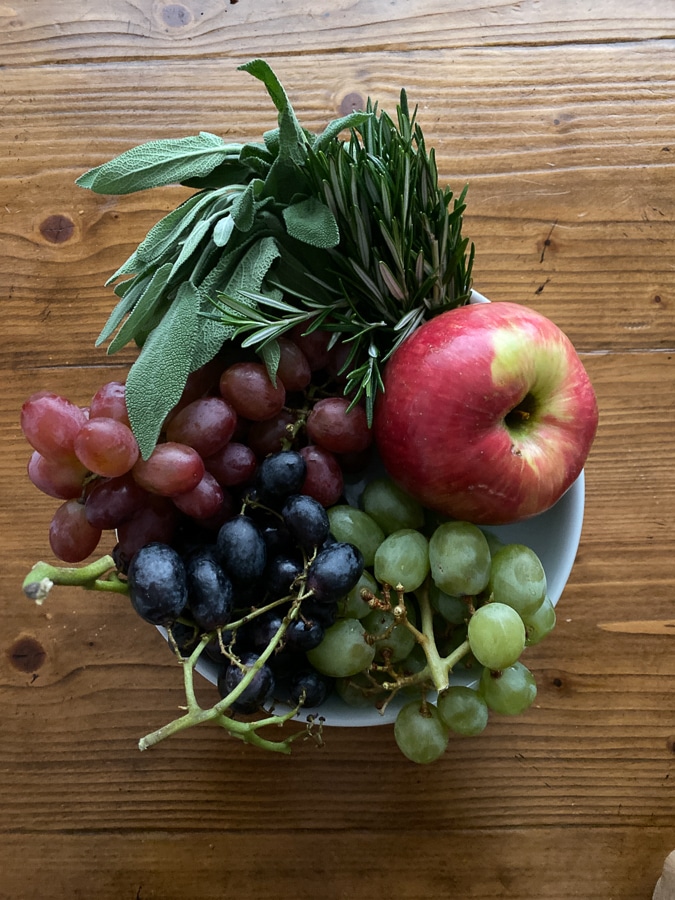
Fresh fruit
Crisp apples and grapes in both colors
Fig preserves
Nuts
Truffle marcona almonds = 100%. Cashews. Salted or smoked almonds. Chocolate almonds!
Fresh Herbs
And the best part? The entire board cost only $60 from Trader Joe’s!
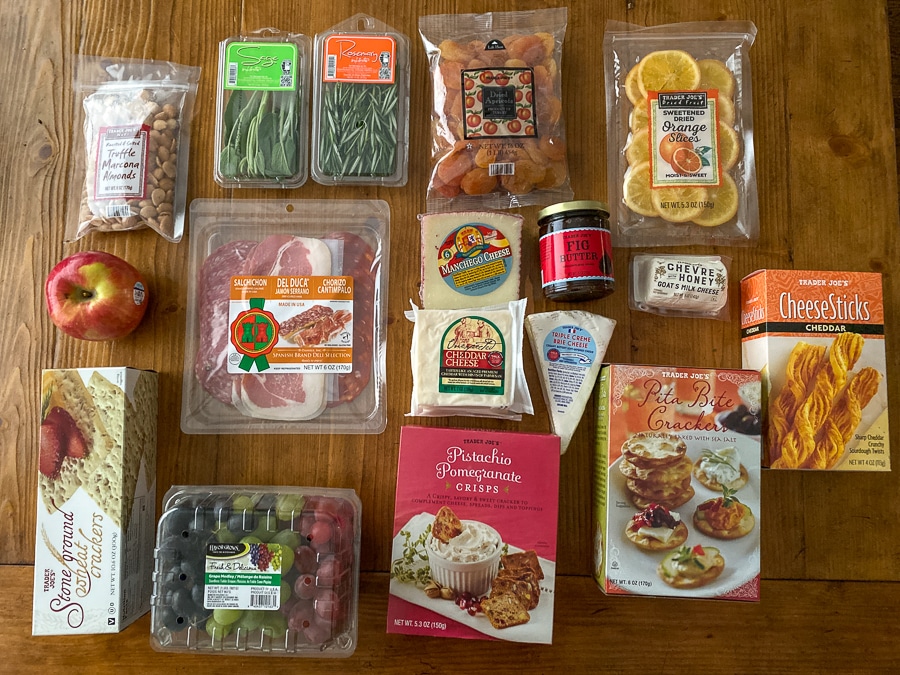
Charcuterie Board Shopping List
Yup, everything comes from Trader Joe’s!
The ingredients don’t look as fancy in boxes right? But all assembled your guests will think this is the board of all boards.
What To Include:
- Manchego cheese
- Unexpected Cheddar cheese
- Triple Cream Brie cheese
- Fig butter or other preserves (Trader Joe’s Pumpkin Butter is also amazing!)
- Truffle marcona almonds (you’ll use half) (6 oz)
- Bag of dried apricots (you’ll use half or so – save the rest)
- 2 colors of grapes (get the mixed grape container)
- One honeycrisp apple
- Sweetened Dried Orange Slices (5 oz) (these are SO good, but you can also use fresh oranges)
- Trio of Spanish meats (6 oz)
- Fresh sage
- Fresh rosemary
- Stone ground wheat crackers
- Pistachio Pomegranate Crisps
- Cheddar Cheese Sticks
- Pita Bite Crackers
There’s an extra goat cheese in the photo that we decided not to use, but of course you can mix and match any cheeses like blue cheese or an herbed or cranberry goat cheese.
Board Shopping Tips
Try to choose three different styles and flavors of cheese so you’ll have variety.
You can also consider adding little bowls with hummus or more savory options like marinated artichokes or olives.
A little bowl of chocolate covered nuts or a few dark chocolates is also a nice touch!
You won’t use ALL the crackers, nuts or fruit, on the board, but you can also keep a stash to the side to replenish if needed.
How To Put Your Thanksgiving Charcuterie Board Together
Watch the how-to video on YouTube here!Gather Your Equipment, Prep Fruit, Unbox Crackers
Do your chopping and prep on one board and assemble on the serving board. That way the serving board stays nice and neat.
So you’ll need two cutting boards, cheese knives, and a few prep plates to corral ingredients.
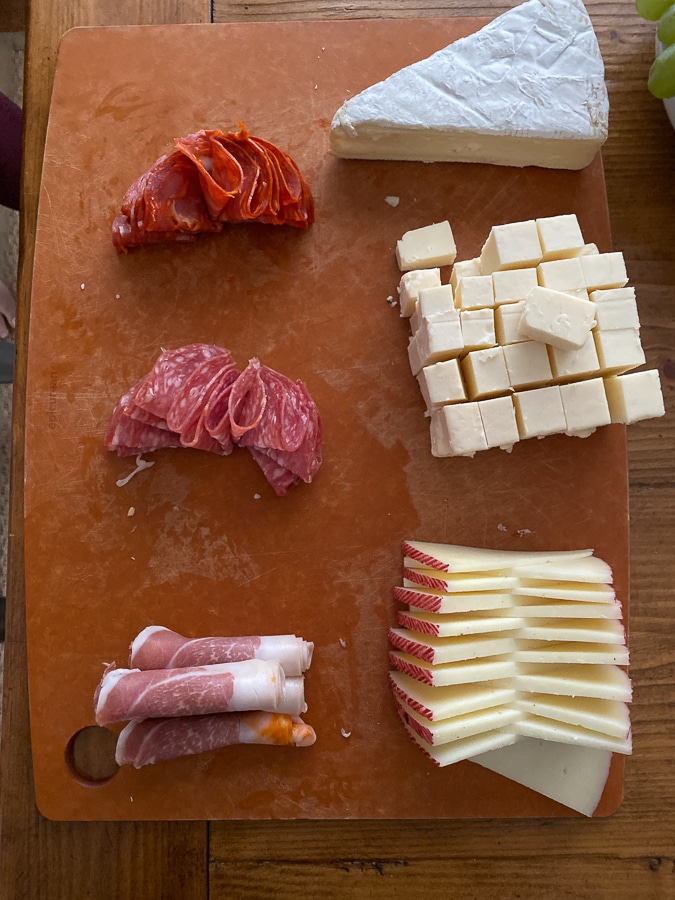
Prep the cheeses
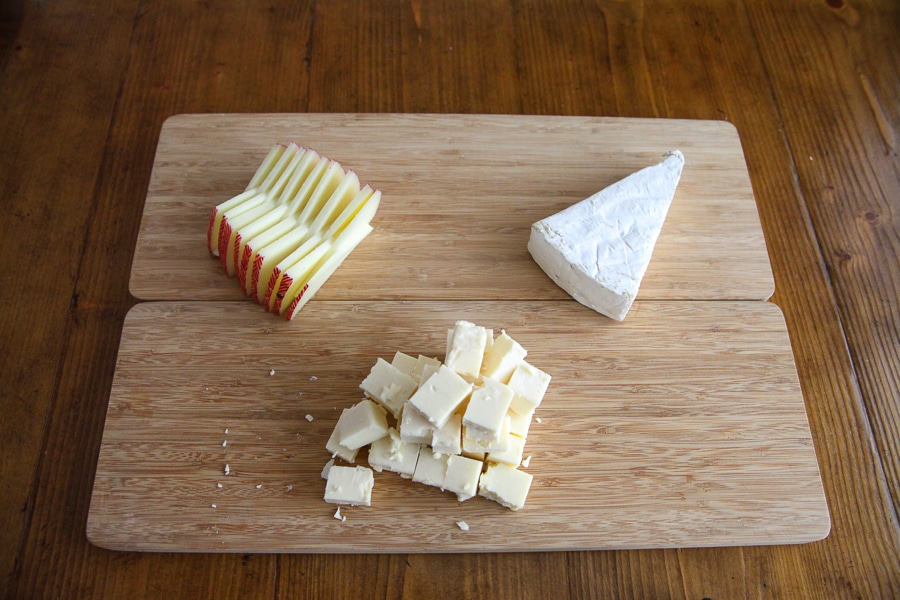
Keep the brie whole and cube the cheddar.
How to cut triangle cheese for charcuterie
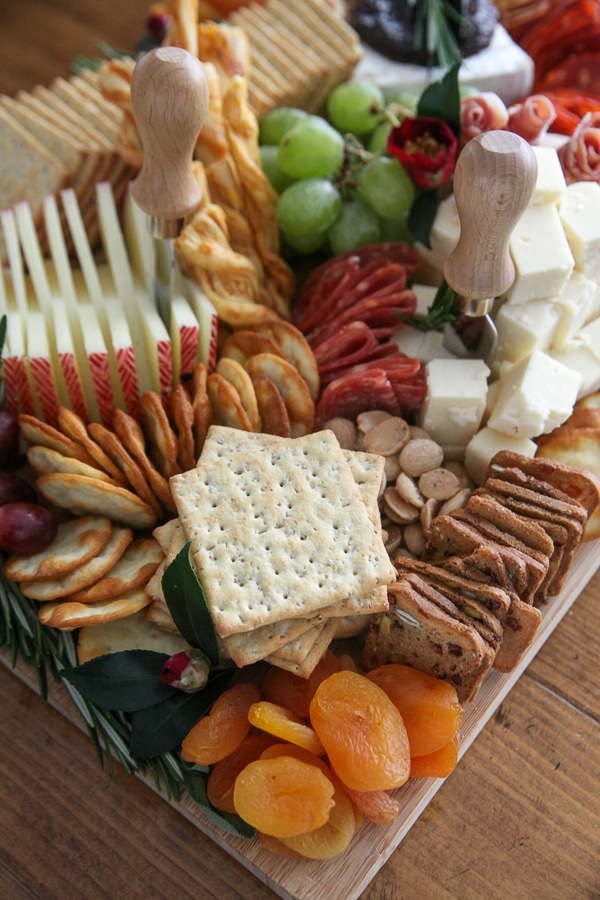
Turn the manchego on its side and slice into triangles. Then stack them vertically. Once you have a tower, you can turn on its side to be seen as zig zags on the board.
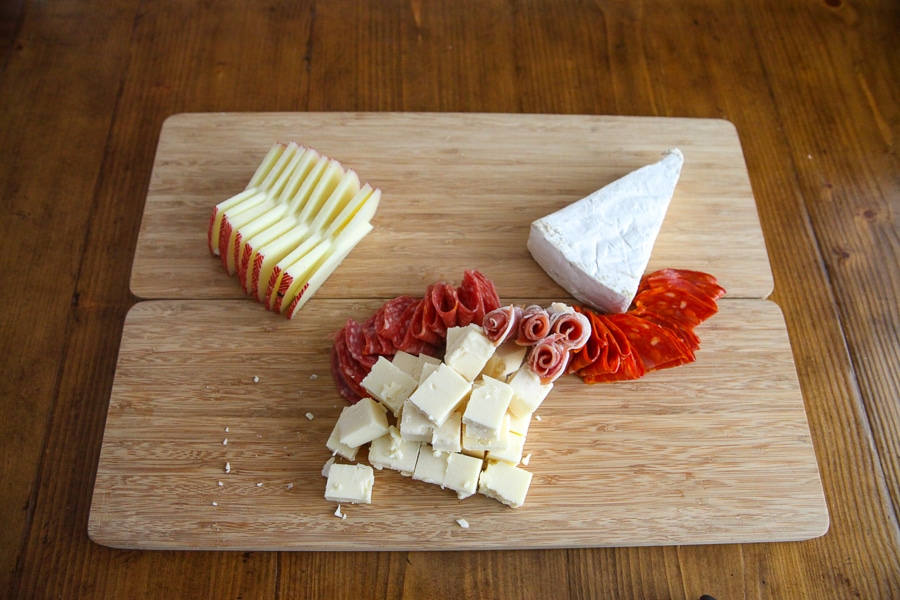
How To Fold And Roll Meats
- Roll oval meats into cigars
- Fold circular meats into “flowers”
Assembly
Once everything is all unwrapped, washed, cut, you can start assembly!
Step 1: Begin by anchoring the board with the cheeses.
Step 2: Add meats as a winding river around cheeses, turning rolled “cigars” up vertically.
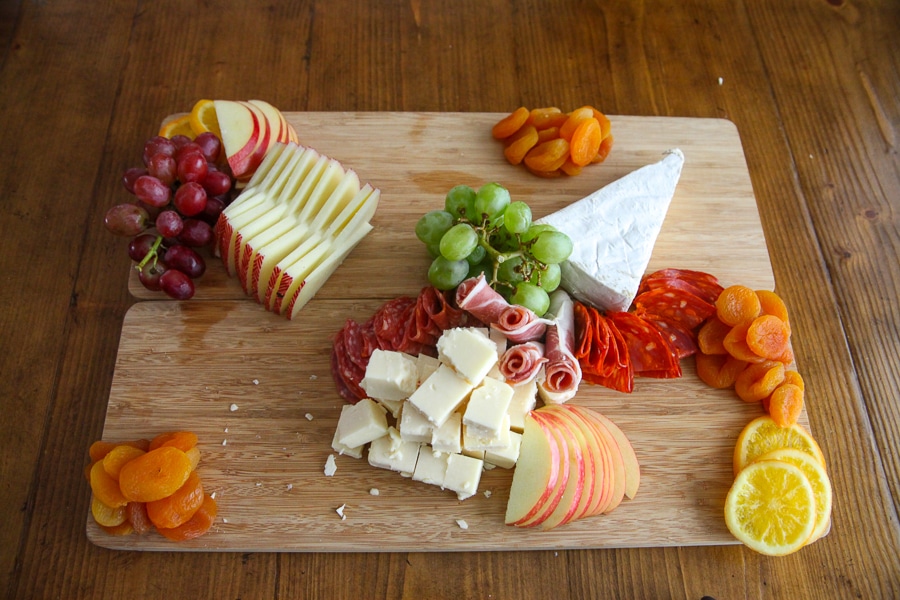
Step 3: Add fruit
Stand grapes up as much as possible so the stem is up in the air.
Place piles of dried fruit around.
Anchor corners with oranges slices (I think these are soooo pretty!) and thinly slice apples to display in a fan.
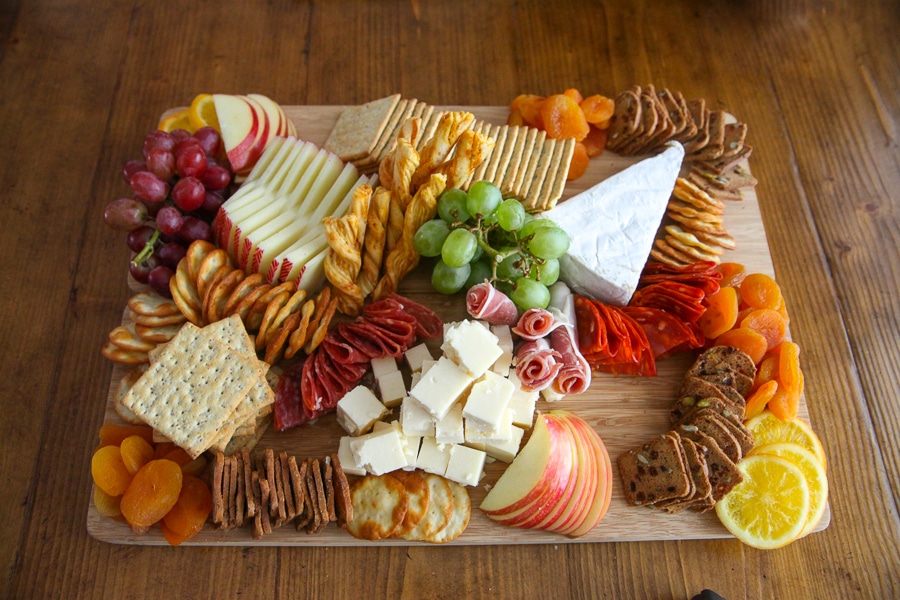
Step 4: Add crackers in groups and bunches, like fans, dominos and piles.
Note how the breadsticks are halved and standing up as much as possible.
Step 5: Filling remaining empty spaces with nuts.
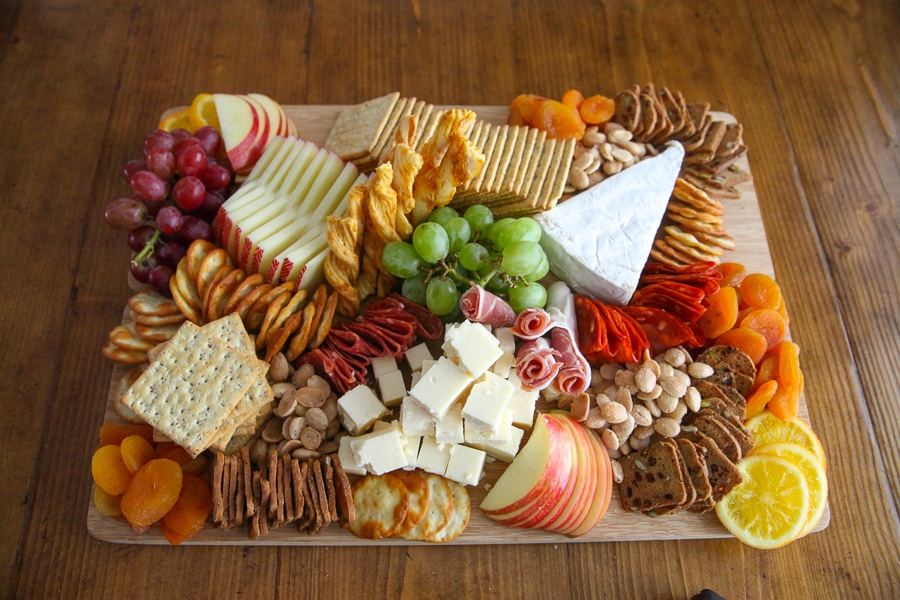
Step 6: Make a dent in the brie and pour on preserves.
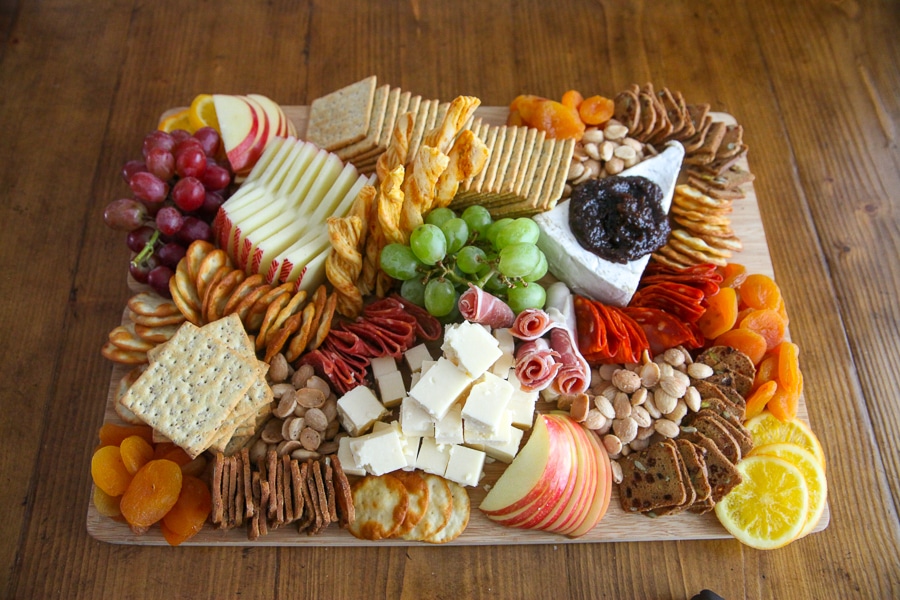
Step 7: Add fresh herbs in remaining spaces.
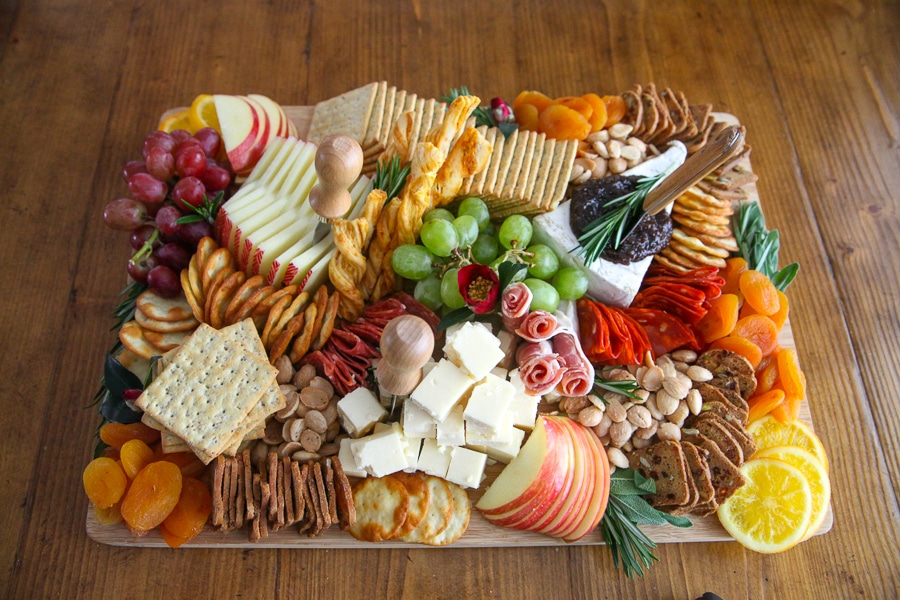
Watch it magically build:
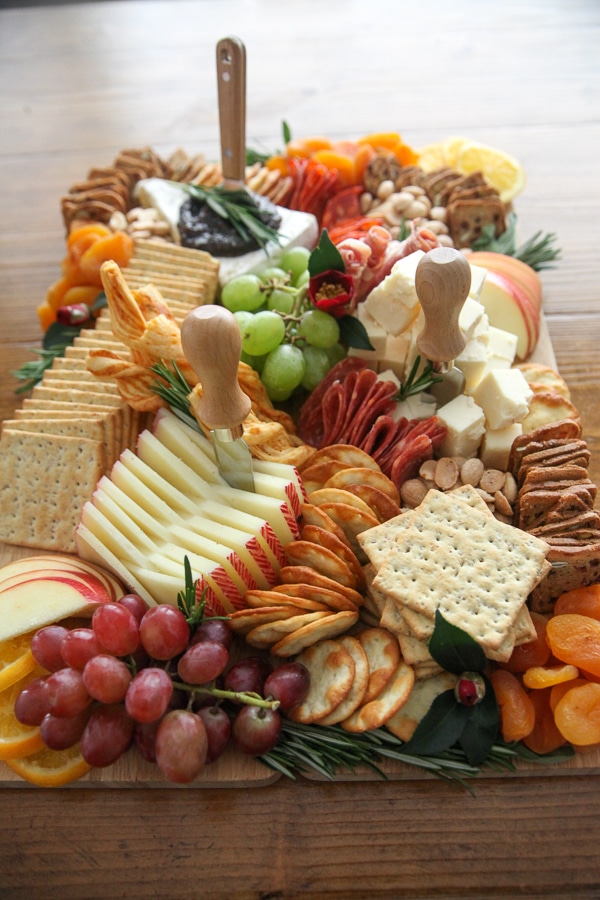
Charcuterie Board Tips
Board Size
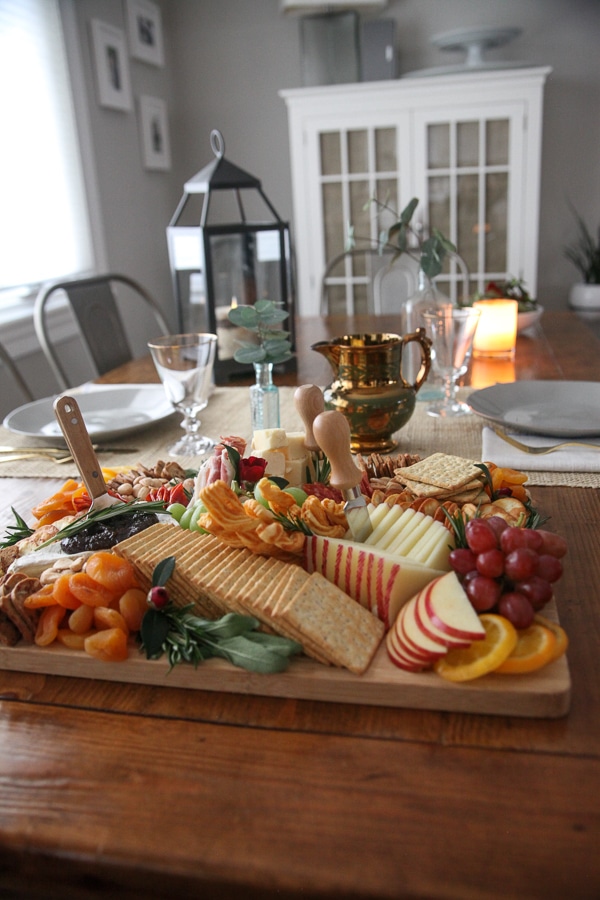
If you don’t have a large enough board, you can put two boards together or use a platter. Since you’ll do most of the cutting on your prep board, the serving board is more for display.
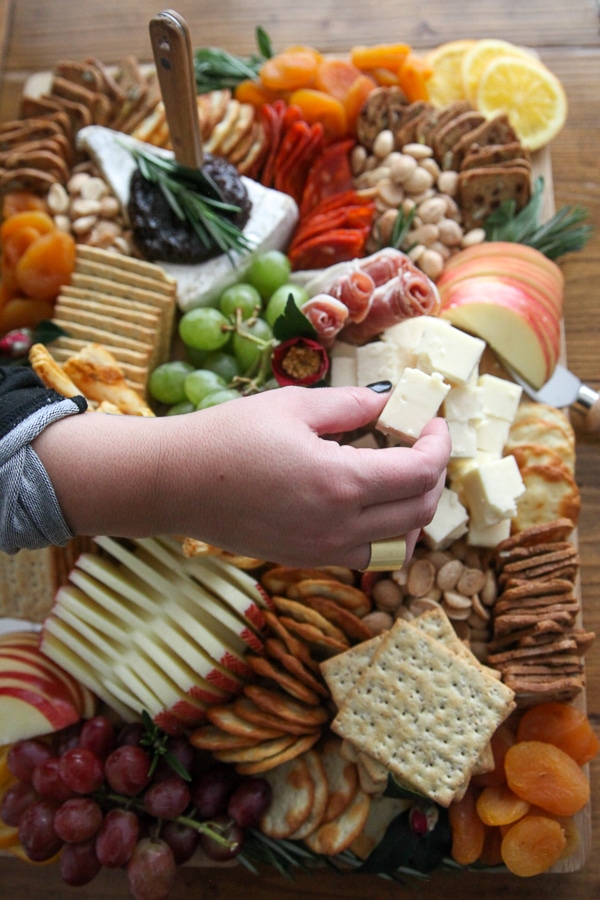
Transporting to a party
If you need to transport board, you can put rosemary vertically or use the knives to keep plastic wrap from smushing the board.
I also like to put the whole board inside of a large tray with sides to prevent it from shifting. A large shallow box would work too.
Use Bowls For Dips
If you’d like to add a dip like hummus, use a small bowl and anchor it with the cheese.
Add something sweet
Every charcuterie board needs a tiny bit of chocolate!
More party and charcuterie board ideas:
- Small Charcuterie Board
- Christmas Charcuterie Board
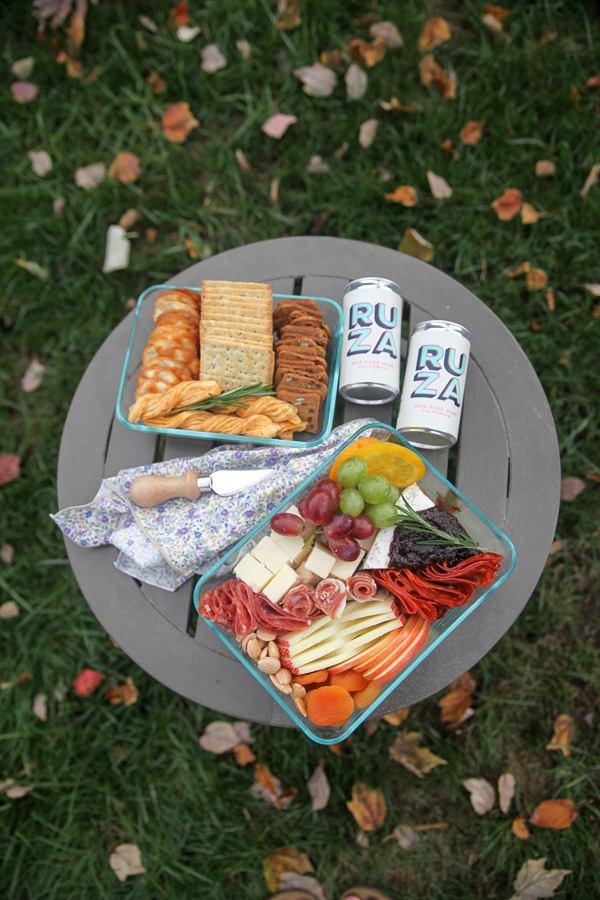
- Picnic Charcuterie Board
- Kids Charcuterie Board
- Breakfast Charcuterie Board
- Make-Ahead Toothpick Appetizer Ideas
- Bedazzled Goat Cheese
More Themed Charcuterie Board Ideas:
- Christmas Charcuterie Board
- Picnic Charcuterie Board
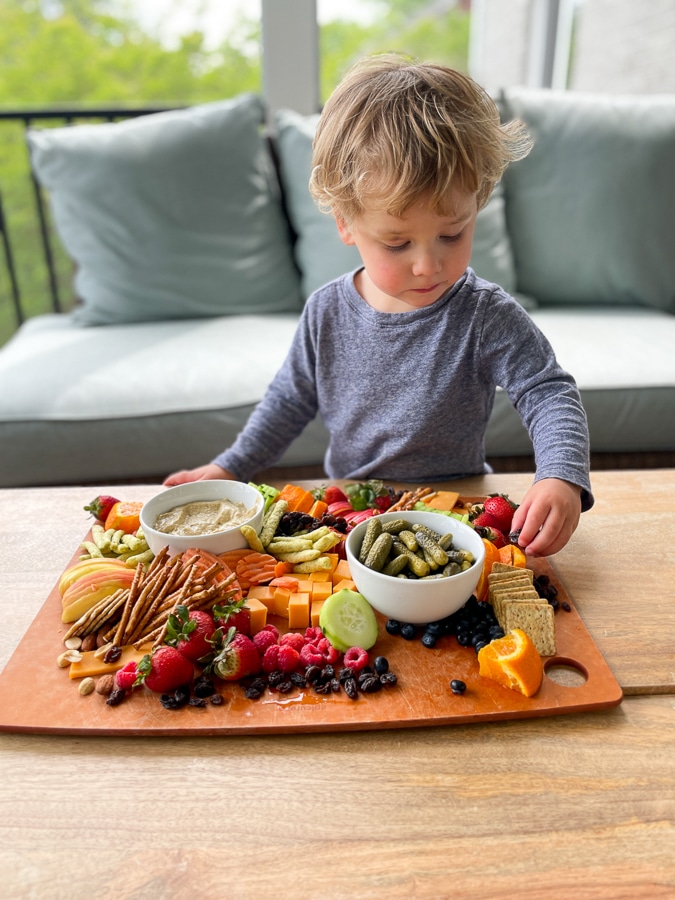
Special thanks to my gal Della for sharing her creative process with us!
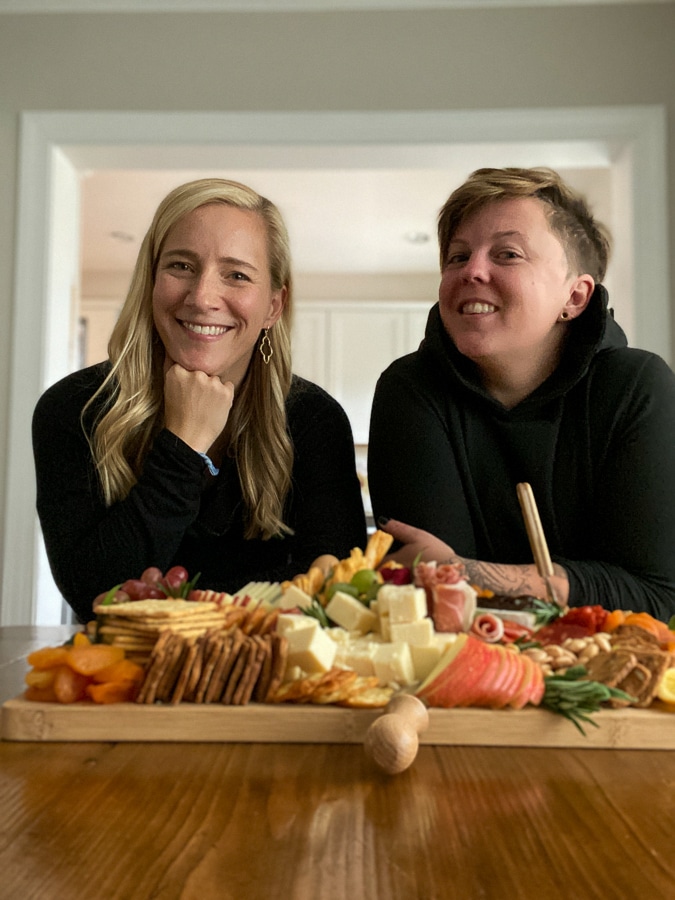
Have a wonderful holiday season!
Better yet, serve it with some delicious drinks: Easy Cocktails for Thanksgiving or 10 Alcohol Free Cocktails.
You might also like: Fall Salads for Thanksgiving or How To Have A Mindful Holiday.






Louise, RD says
That is simply gorgeous ! And you make it seem SO doable-thanks for sharing. Happy Thanksgiving!
Andrea says
Helpful tips and beautiful board! Yum.
Charmaine Ng | Architecture & Lifestyle Blog says
I love how photogenic everything is! Great photos! 🙂
Charmaine Ng | Architecture & Lifestyle Blog
http://charmainenyw.com
Jill says
That is absolutely gorgeous!! Thank you for the step by step tutorial!! By the way, in step three, you’ve got ass instead of as! ?
KathEats says
Hahah oooooops!!
Kelli H says
Looks beautiful! What a great how to.
Tonya says
omg omg omg i’m so excited that I can’t even finish reading this before commenting! I’m SOOOO making this and taking it to PA for thanksgiving! Printing now. thank you! I’ll send you a pic on IG.
KathEats says
YAY! Can’t wait to see it!
Lesley says
I am curious how many do you think this would feed ?
So lovely
Nikki says
That was an excellent post, and a perfect step by step tutorial! Also loved getting to see pics of Della after drooling over her creations for so long lol. I’ve never attempted a cheese board, but you’ve inspired me to give it a shot at one of our holiday gatherings! Thanks 🙂
Nancy says
Love it! You make it look so do-able. What size board do you like? Any suggestions on accessories – love your knives
KathEats says
I’ll have to double check on the board size when I get home, but I would guess 12×18.
And I’d check Williams Sonoma or Crate + Barrel for knives. I LOVE these from C&B. (They have gorgeous boards too)
Joanne says
How much did the whole thing cost to put together?
KathEats says
$60!
Hillary says
This is definitely a beautiful board! Packed to the brim with goodness! I guess I’m just not thinking that 60 dollars is what you should be expected to spend. That’s a whole thanksgiving meal to me.
If you go the Aldi route, maybe you could save some money?
KathEats says
I think for what you’re getting it’s a steal of a price!! Remember this feeds 10-12 as an appetizer, so it’s not for one person.
The Many Thoughts of a Reader says
I bought similar stuff to take to book club this week and yes, Aldi is cheaper!
Minda says
$60 for an appetizer seems steep to me too. I make food for holiday dinners, and the total cost to make one dish that feeds 15 people is maybe $30-40 max. This cheeseboard and how it’s arranged looks fantastic though. Very appealing to the eye.
Tonya says
Aldi is a great idea! Thanks. $60 didn’t seem to steep to me, but I’m single with a grown kid. My job is to bring booze and maybe something interesting. $60 seemed like what I would payfor a pre-wrapped item like this at a specialty store. It’s definitely just as pretty.
The Many Thoughts of a Reader says
This looks delicious! I am taking a charcuterie board for my dish to pass for our book club pot luck this month.
Emily says
Thank you for the “plating” instructions – super helpful!!!
Sara says
When Della expands to Richmond…
#ReadyToLineUp
KathEats says
Hahaha yes!!
Julia says
LOVE this!
connie says
i love everything about this. love love love!
Thanks to both of you for my thanksgiving appetizer 🙂
Connie says
We’re doing it again for Superbowl Sunday!
Erica says
This is one of my FAVORITE POSTS! Keep em coming!
Danielle says
This is the most amazing post! It looks so easy! Can’t wait to try it.
Shanae says
Such a helpful tutorial! Thank you!
Courtney Jacques says
Thank you for your “how to” post! We love a good charcuterie board! And all of that for $60 is amazing! I usually end up spending $100 or so. But we usually serve 12-16 people with it. It is so great because guests can cruise by and try a little of this and a little of that… thanks again for the excellent post!
Courtney Jacques says
Okay, so I am posting again because I have now made several of these boards and give all of the credit to you. Your how-to was SO helpful! I follow your steps to a “T” on how to cut the cheese and arrange everything. There are several articles out there on charcuterie boards, but yours look so high-end compared to theirs and all of your little details make it look so professional and gourmet. Anyone can throw those ingredients on a cutting board, but to arrange it the way you do with varying colors and textures is a true talent. I am so grateful I found your post!
Kath Younger says
Thank you so much for the feedback!
Bonnie Cooper says
This is stunning and thank you so much for explaining in detail how to put it together.. I was wondering if you dip your apple slices in lemon juice so they won’t brown? Or is there something else I am not aware of? Wait, there’s lots of things I am not aware of, haha, but how to add fruit so it stays fresh and looking nice? Thanks again so much.
Kath Younger says
Haha I didn’t here but they were freshly cut. I think as long as you’re serving it within a few hours you don’t need to, but it certainly couldn’t hurt!
Mojoblogs says
One of the things that I love about charcuterie boards is that you can pour your creativity into it. And yours is really gorgeous. Thank you for sharing your process on making this.
Corey Francis says
By far the best instruction on doing a Charcuterie Board ever!!! thank you for making it simple.
Kath Younger says
Thank you!
Diane Wrigley says
This looks absolutely stunning! I have a question about the Manchego. I see on your display, and I’ve noticed on others, that you leave the one end of the rind on, I’m assuming for a nicer presentation. I’ve read conflicting thoughts on whether the rind is edible or not. Some sites say it’s rubbed with oil; others say it has a wax rind. If it has a wax rind, what would guests do when they get to the edge? It would be a little awkward to have to nibble down to the edge and then leave on plate. I would love to make something similar to this, although on a much smaller scale. Thanks so much!
Kath Younger says
Hi Diane! That’s exactly what I usually do – nibble to the edge and leave it on a plate or napkin. But you can def just cut it off if you’d like. Usually if it’s the wax kind, you can very easily peel it off. If it’s more of an oil stain, I just leave it and sometimes eat it!